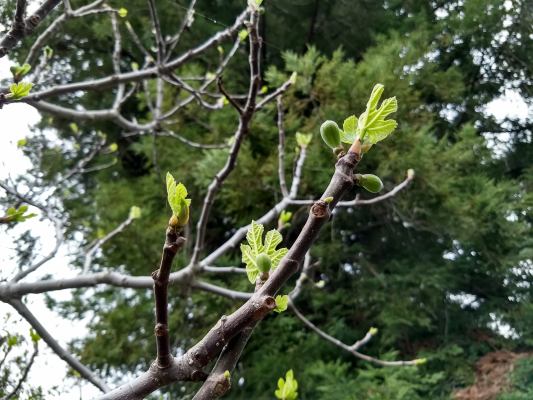
Hello Spring! This fig tree is quite the tease, tantalizing me with fruit that won’t ripen for another few months!
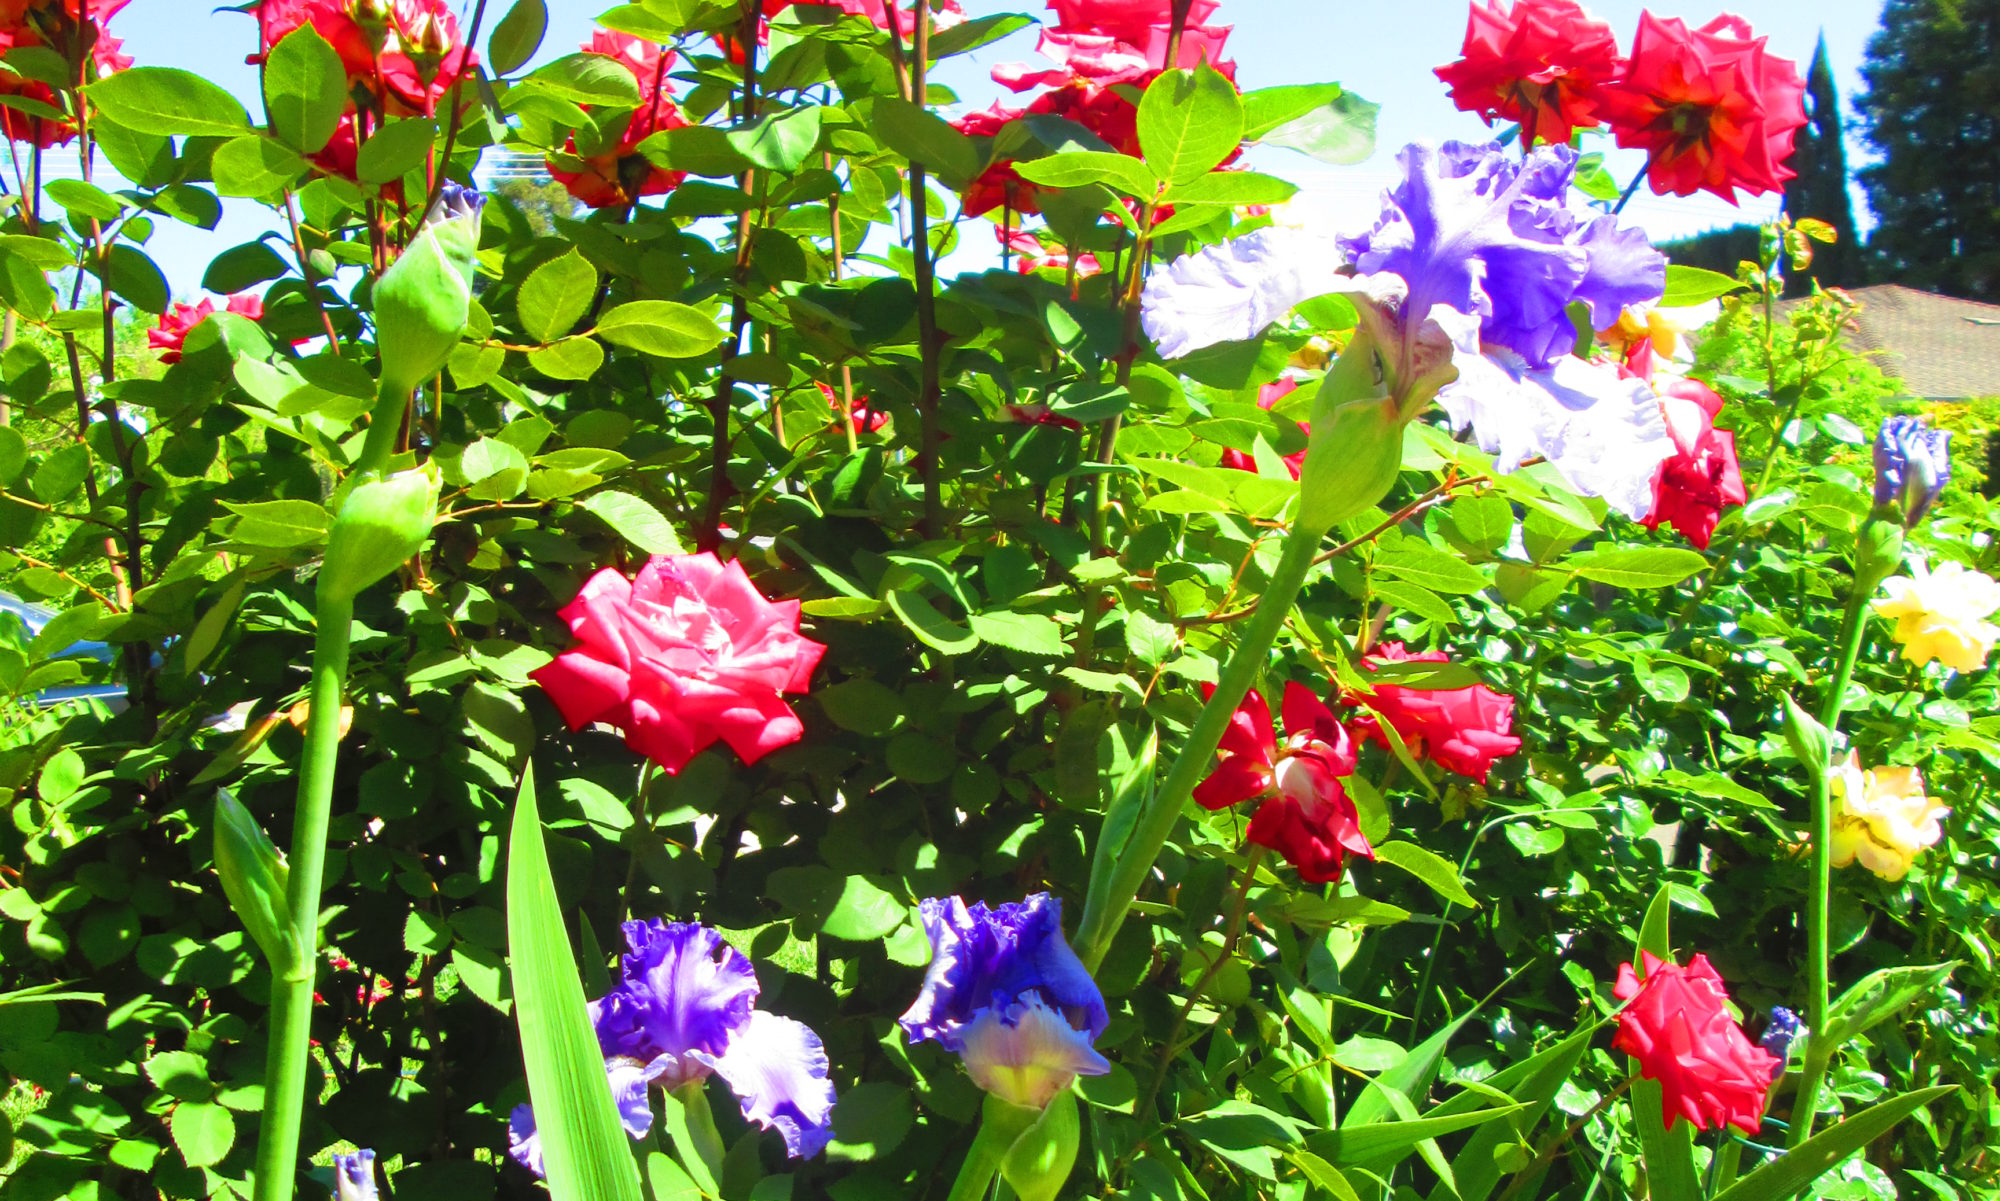
Happy 1st Day of Spring!
It’s been a busy week. Still recovering from bronchitis and fighting allergies – hello Spring?!? Despite the illness, the teaching, and the symphony set I’m frantically preparing for, I’ve been getting my daily dose of garden therapy. My goal has been to pull a minimum of one 5 gallon bucket of weeds a day. The ground is still wet from all of our rain so it’s been painless to meet my goal. In fact, I’ve been pulling quite a bit more than that. This is a good thing. With all of the rain, then warm, sunny days, then rainy days, then more warmth and sun, the weeds have been growing like gangbusters! I’m itching to get some veggies in but other than transplanting a few celery starts (celery self-sows itself all over my yard), I haven’t done much of that yet. Next week is another week! In the meantime, HAPPY SPRING!
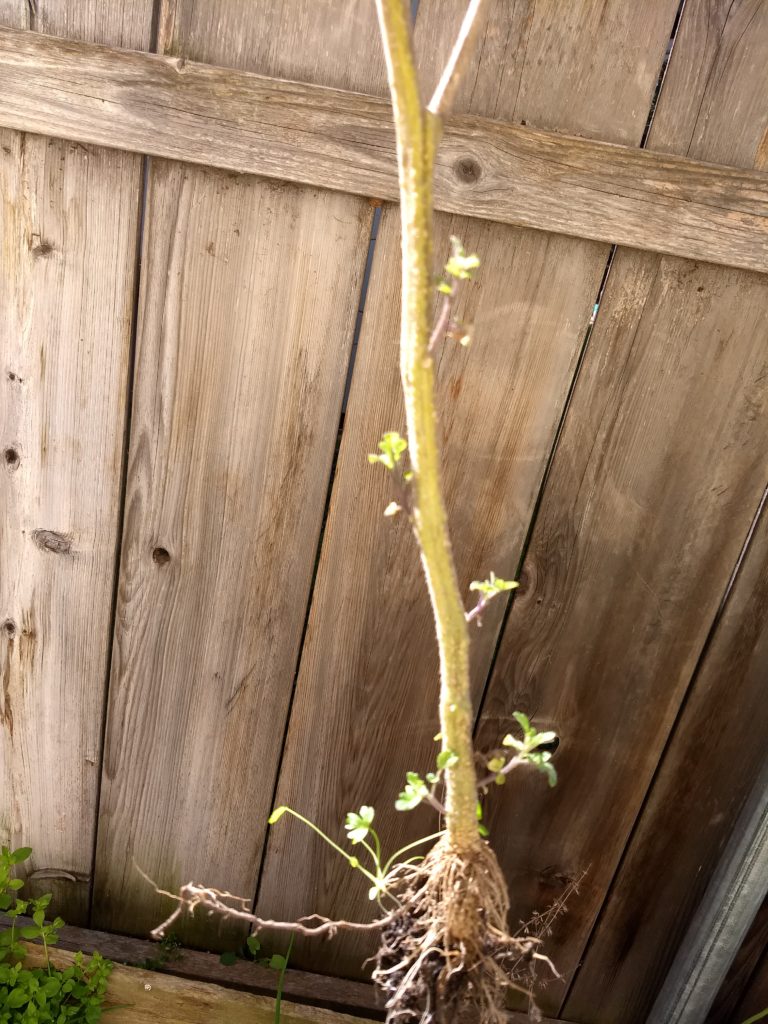
Bronchitis has really set me back this year. My garden is progressing but at a snail’s pace. I spent a few minutes this morning, which is all I had energy for, cleaning up a small area of the raised beds. I went to pull up what I thought was a dead tomato and found life! The beds are on the South side of the house against a stucco wall. And while we had a really wet winter, I didn’t think of it as being particularly mild. Apparently it was!
A winter-hardy tomato being relocated!
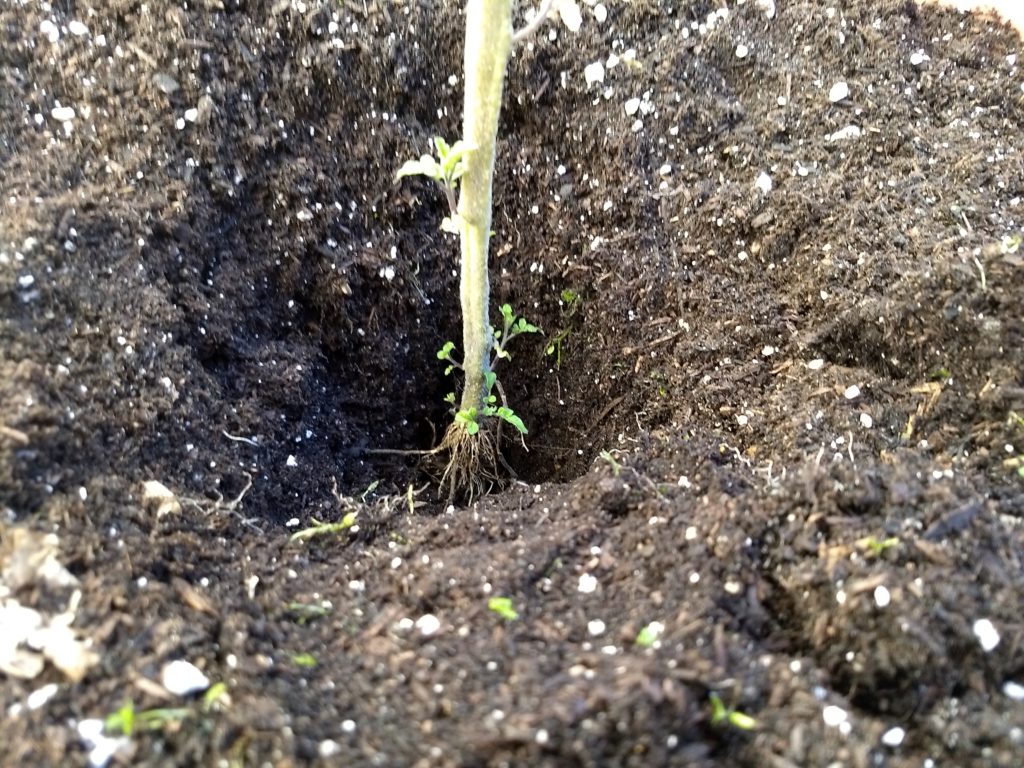
I think this may be an Early Girl from the nursery, which I planted late in the season after my heirloom roma tomatoes developed a blight and had to be pulled out. And while Early Girls are not the tastiest, biggest, or sauciest tomatoes available, they are blight resistant, which is the only reason to reach for a hybrid, in my opinion. I would love to do my part in the world of the home gardener and help develop a blight resistant heirloom but when your planting areas are measured in inches instead of acres, you can only do what you can do. In any event, this plant is my experiment! I planted it fairly deep – about 8″ – covering up the the bottom sets of leaves and only leaving a few sets higher up above ground. We’ll see what happens!
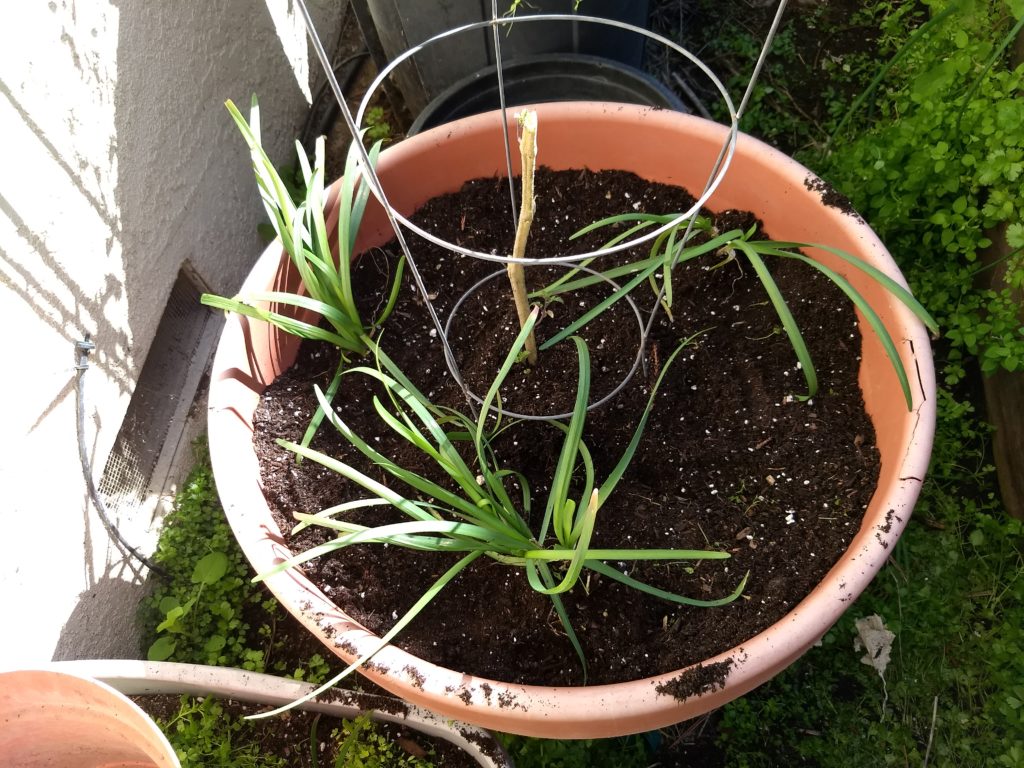
My “perennial” tomato experiment – surrounded by an army of garlic chives I thinned from another bed!
Update:
My “perennial” tomato produced for another full season. It turned out to be a cherry tomato and, like most cherry tomatoes, was quite prolific! Unfortunately, it didn’t make it through this past winter. I carefully examined it for signs of life before pulling it out in late April 2020.
I just needed to get through a particularly grueling work week. Did it, yay! Got up the next morning, went off to my one obligation of the day, came home an hour later with a throbbing headache. Things went downhill from there. Fever, chills, chest congestion, you know, all the fun stuff. Bronchitis. Good times.
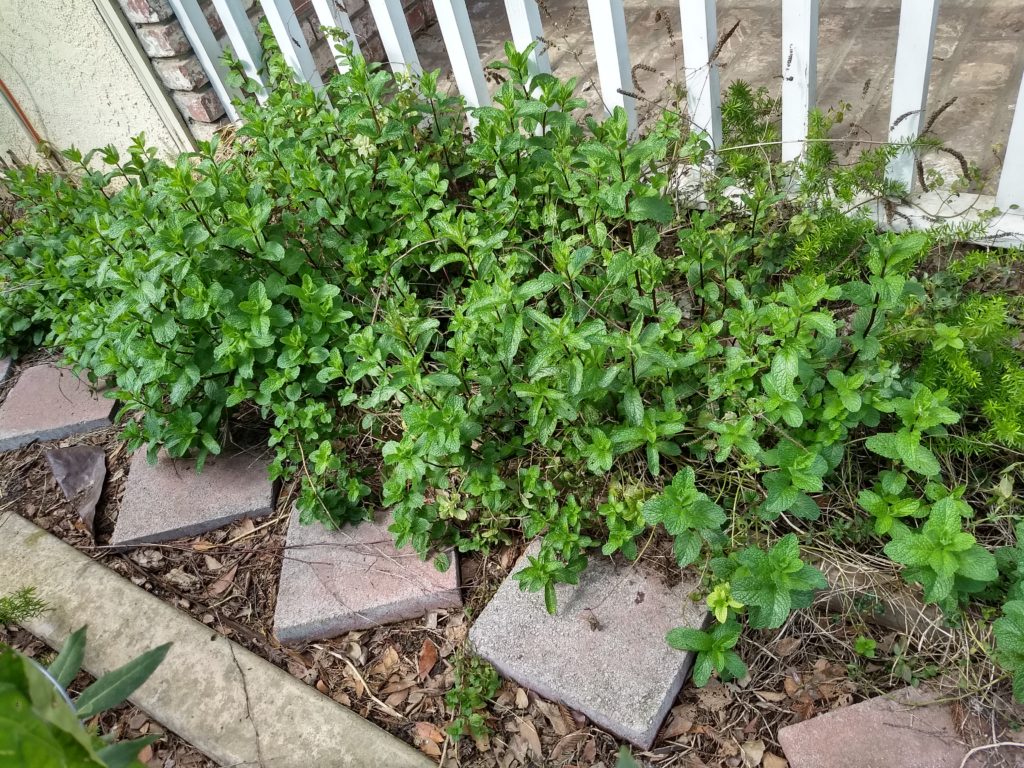
Spent 5 days trying not to drown in phlegm, watching old movies, and being absolutely worthless. I was so looking forward to getting a few things done in the garden but didn’t happen at all. The one thing I did harvest regularly and enjoy was my mint. Mint is wonderful for things like nasal congestion, headaches, and muscle spasms – all things I got to experience! I normally use peppermint for this purpose but it is only March and my peppermint is still mostly dormant. It’s just now starting to send out leaves. But for some reason, my spearmint, planted in the same area, never went dormant this year. So, lots and lots of spearmint tea loaded with local honey was consumed this week. It helped immensely with the sore throat and helped clear my sinuses. I think I still prefer the taste of peppermint but for medicinal purposes, the spearmint did just fine!
Naughty Spearmint attempting world domination.
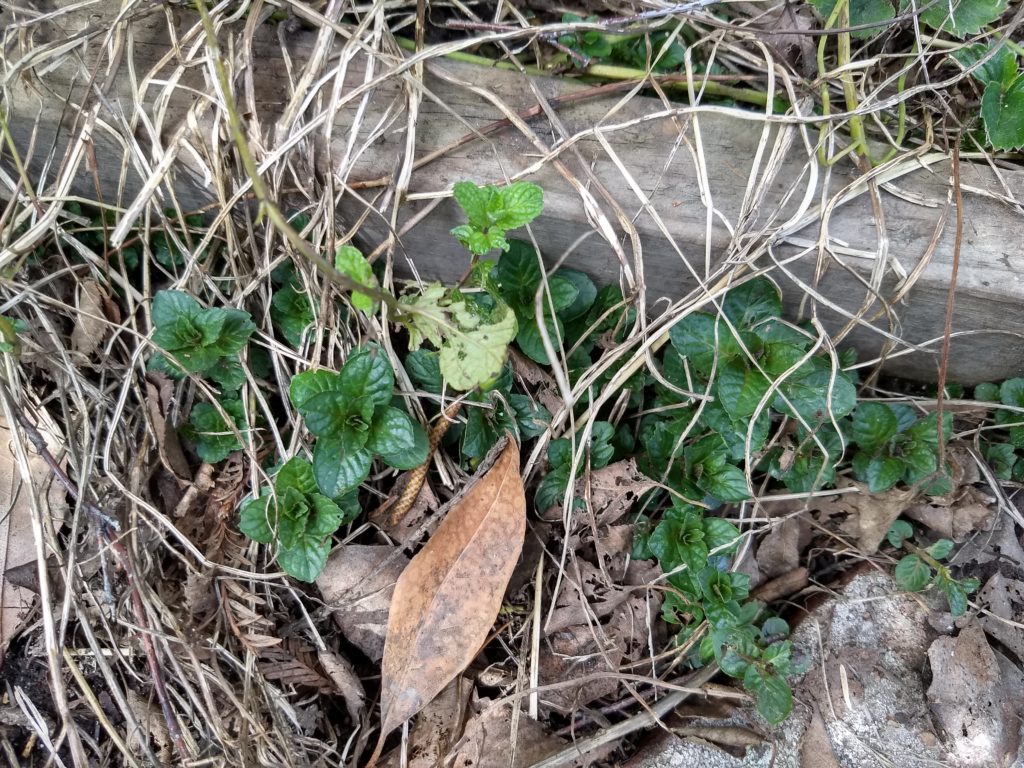
Peppermint – peaking out through last years crab grass! Not quite enough, yet, to get me through a bout of bronchitis.
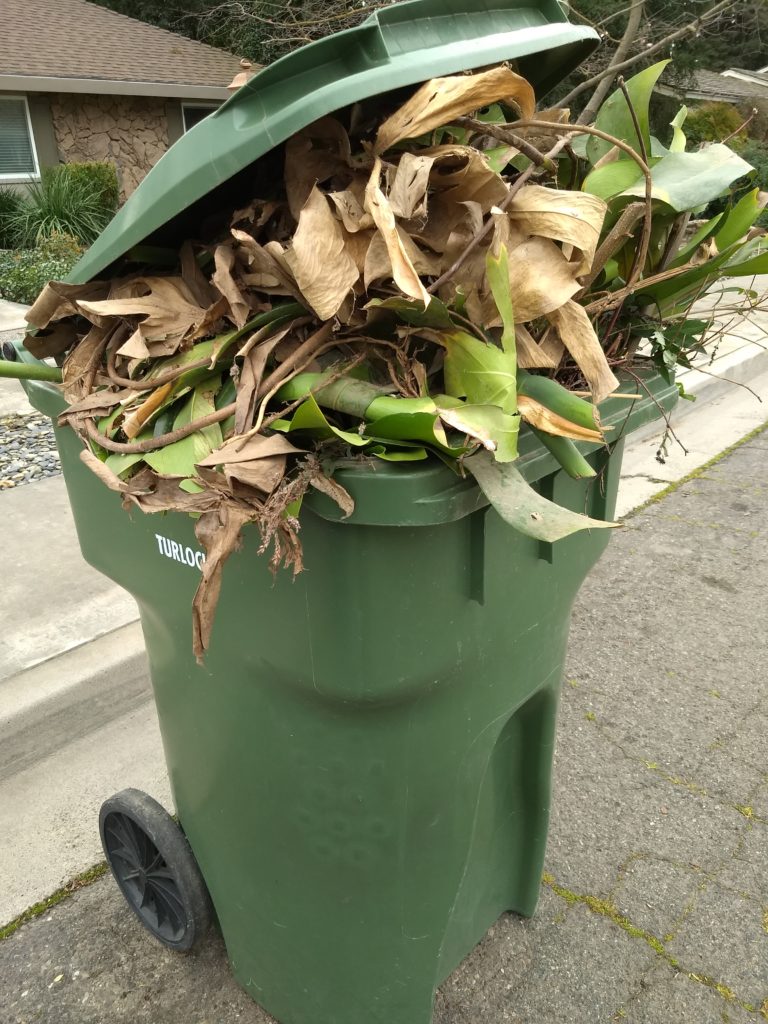
It’s trash day which means looking up and down the street to see who hasn’t filled their green bin! LOL Yes, I do compost but this time of year I have far more yard waste than is possible for me to compost. I’ve been frantically trying to finish pruning the fruit trees and elderberries. I ended up filling up three of these bins this week:
I am also bidding a fond farewell to my raspberries this week. I’ve grown them for 12+ years in containers and I will miss nibbling on them while I’m out watering. But the amount of water required to produce such a small volume of low calorie food is simply not worth it. Especially since I can buy an entire season’s production for about $5 in the freezer section of my grocery store! I was able to find good homes for almost half of them. 🙂 The large pots and trellis system will be planted with purple sweet potatoes, a much better bang calorically and nutritionally for my limited space and watering restrictions. It’s a bit early, but I am impatiently waiting for the organic sweet potatoes I purchased to start sending out slips. I couldn’t find any locally so I ordered a case (50lbs) from my local grocery store for$48. We’ve been eating lots and lots of sweet potatoes lately! I’ll post some of our favorite recipes in the recipe section. The sweet potato brownies were surprisingly good – even my husband ate them! And forget oatmeal for breakfast, try roasted purple sweet potatoes and apple sprinkled with cinnamon and chopped pecans. YUMM! I’ll miss my raspberries but I’m looking forward to my sweet potatoes!
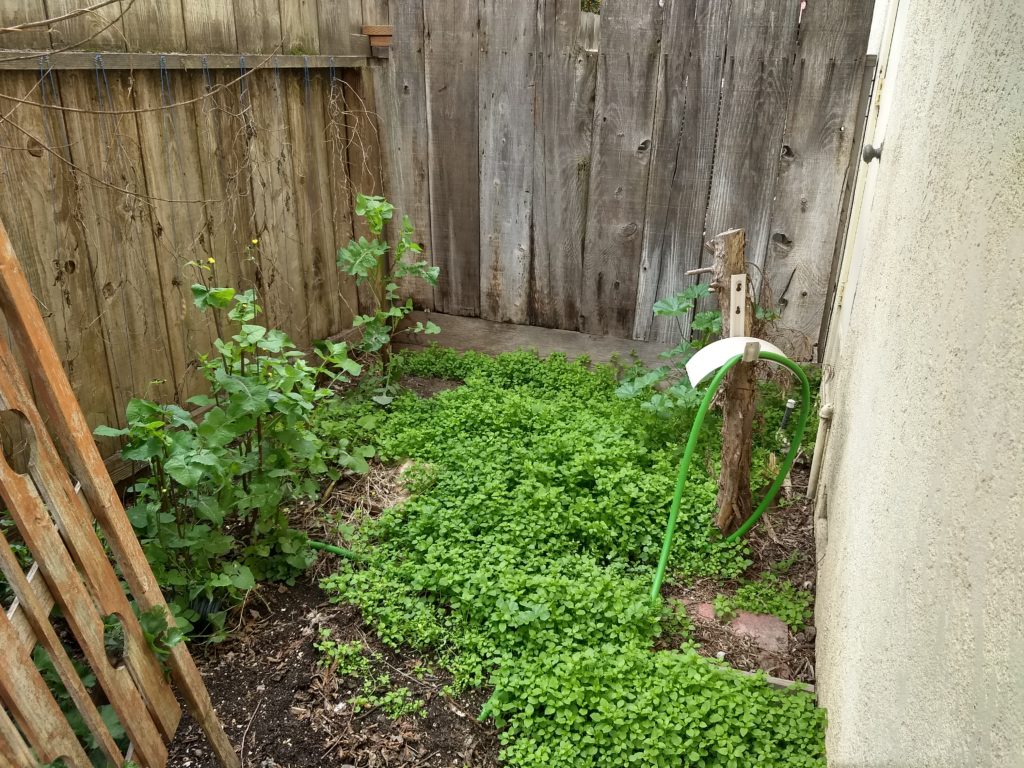
Part of the challenge of gardening on an urban lot is tucking in as many veggies as possible in whatever spots are available to you! This area, roughly 9’x3′ of useable growing space, has been my compost area for several years. Using the “slow method”, I had three separate piles going at all times. But due to limited space, I decided that the slow method wasn’t giving me maximum results and took up valuable dirt space that could be used for growing edibles. So, last year I chopped down a shrubby useless tree-thing (you can see the stump being used as a hose holder), shoveled out 5 wheelbarrows of awesome compost into my garden beds, and planted some veggies.
Then life happened. Do you see the back fence? On the opposite side of the fence is where the air conditioner lives. After 42 years, our air conditioner went out. Pretty good life-span for an ac unit, especially here in Central California where we get several weeks of triple digit days during the summer months. So, the fence came out and the ac crew trampled my lovely kale, grape tomatoes, chives, and even the beans climbing up the fence, back into compost. But, losing a few kale plants was a small price to pay for having air conditioning!
So, I got the area cleaned out and re-planted a few weeks ago. I did cheat and planted a few dozen bean seeds along the fence but I doubt they come up. February is too cold for seed germination. So I will be planting the climbing areas in earnest in another month or so. I was smart and bought my purple beans early this year. Last year I waited too long and had to plant regular green beans. They tasted great but I missed half of them because they hid so well among the leaves! In the past, I’ve always kept my own bean seed but due to life interfering with my gardening ambitions, I haven’t been able to save any for a few years. So, I’m starting fresh this year!
I also have to confess to buying kale and brussel sprouts starts from the nursery. I did start several dozen kale seeds that I had saved from last year. They were growing great until they weren’t. I watered them one day and the next, slugageddon! One of the drawbacks to living where we have fairly mild winters is that a gardener is doing battle with the slimy hoards 12 months out of the year. Sigh, so instead of being self-reliant, I supported our local economy, which is also a very good thing! LOL
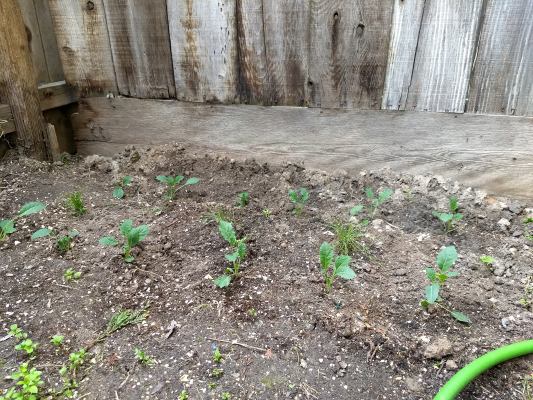
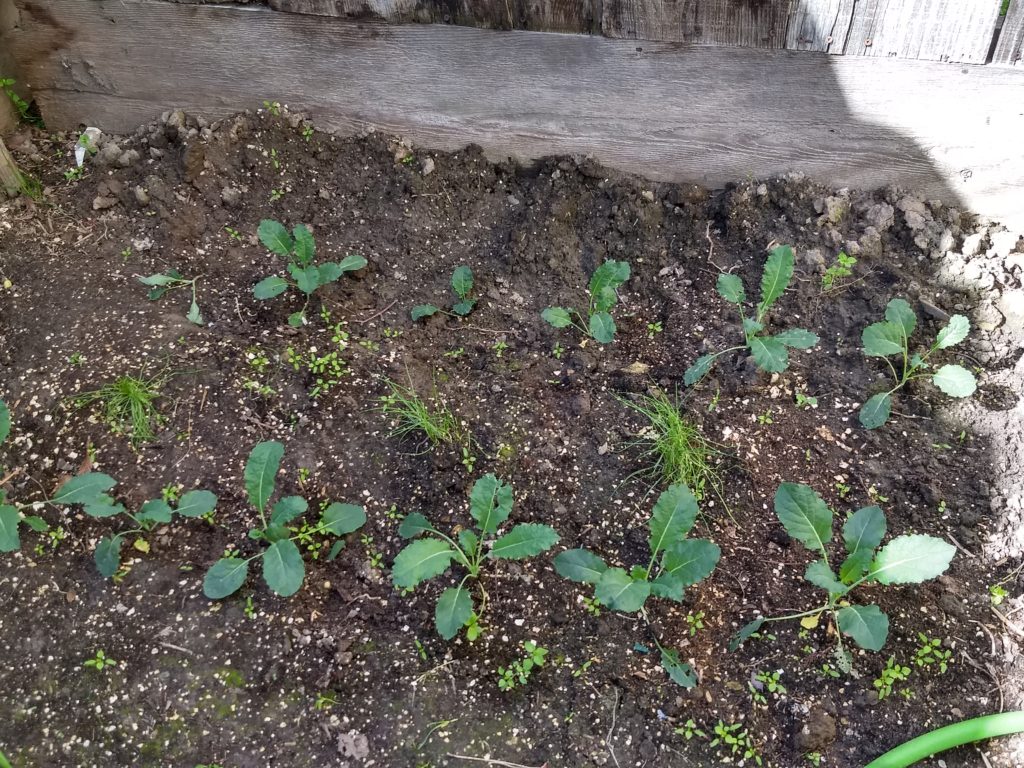
2/12/19 All planted! Kale, Brussel Sprouts, Chives, and a few bean seeds against the fence.
Two weeks later, and all is growing well, except the beans! LOL It’s hard to see, but I’m using weed eater cord for the beans to climb. We had two spools from our now defunct weed eater that wouldn’t fit into our new one. Waste not, want not, right? Today’s pictures below:
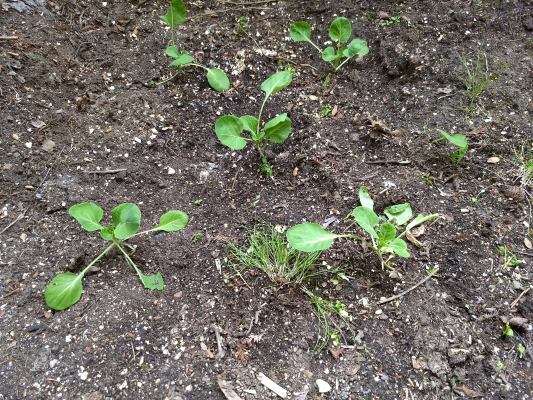
2/25/29 The brussel sprouts have grown a few inches and are really loving all the rain we’ve gotten in the past two weeks. But I should probably put some more Sluggo out . . .
2/25/19 The kale, chives, and weeds are really taking off. Even though we’ve had some light frost, this area of the yard is fairly protected. In another two weeks, I should be able to start using a few kale leaves in our salads.
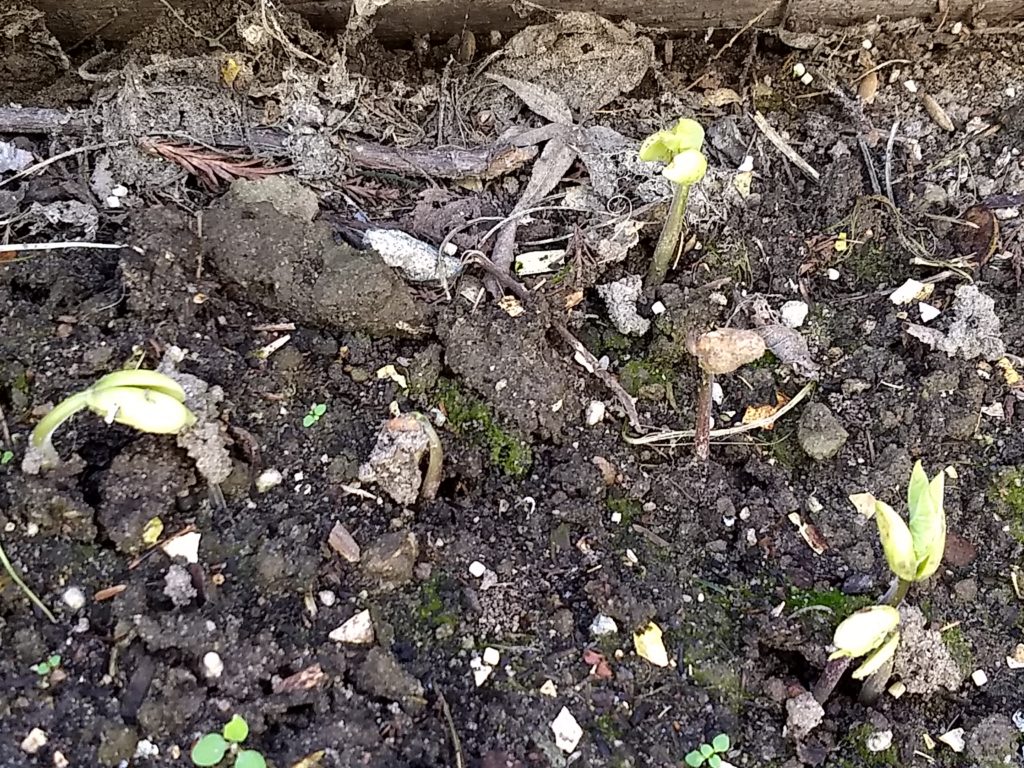
Update 3/12/2019
The beans are up! Wow, it’s too early but they don’t seem to have been held back by recent frost and heavy rains! Depending on which chart you use, our last frost date is anywhere between February 20 and April 12. Personally, in my adult gardening life, I can’t remember a frost after March, so chances are good that these beans just might make it! If not, I can replant! I should also note that this is in a fairly small, sheltered corner of the yard.
The kale have many more sets of leaves!
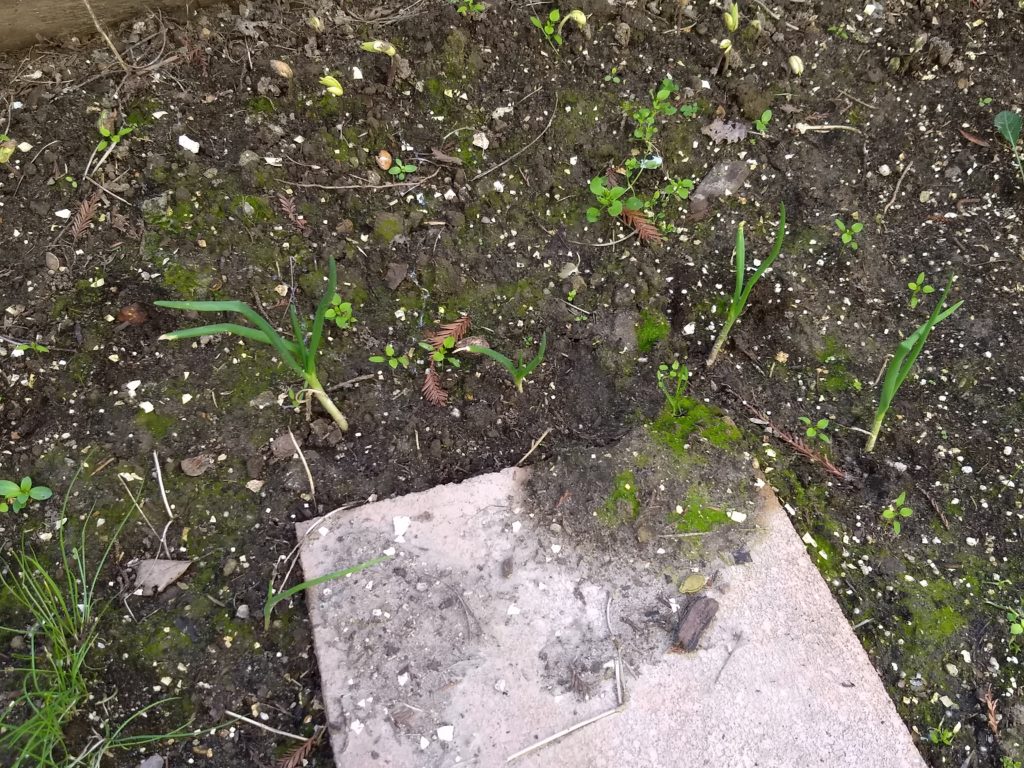
Egyptian walking onion babies that I rescued from the lawn and tucked into this section.
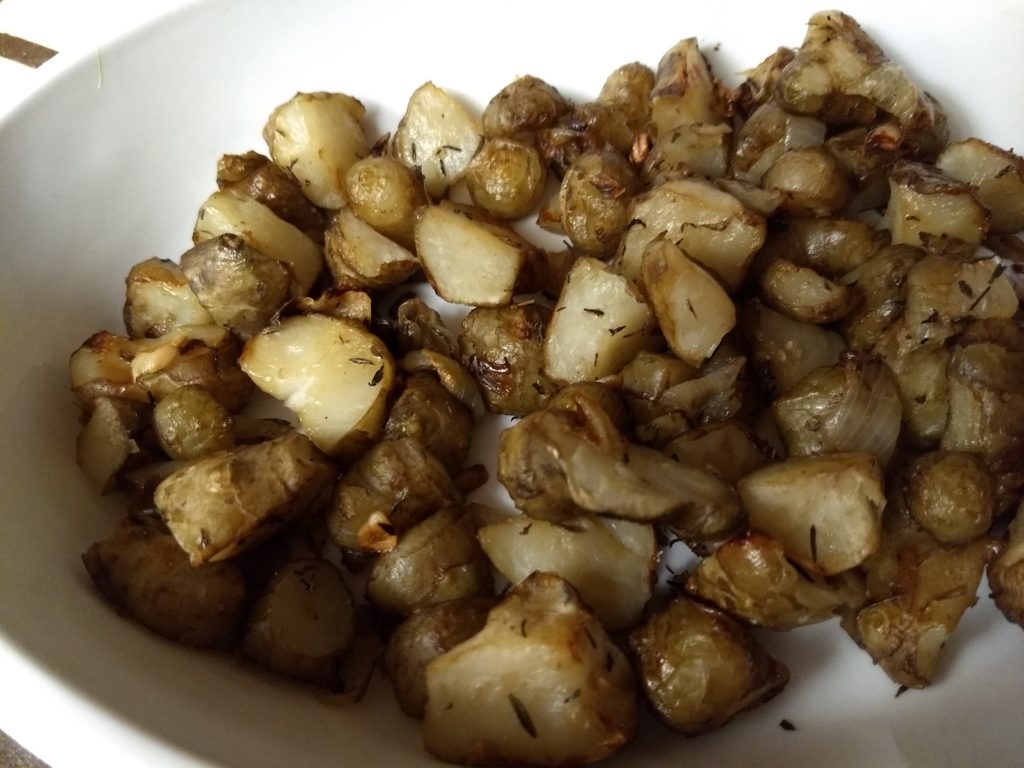
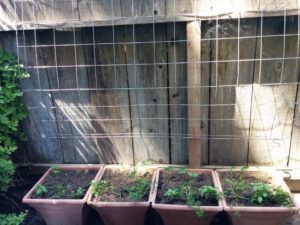
One of my winter garden chores is to re-do my Jerusalem Artichoke beds. After twelve years of triple digit summers, the plastic planters have started disintegrating. I’ve also been lazy about harvesting them as often as I should which has resulted in crowded planters. So, Jerusalem artichokes have been on the menu more often than not! Usually, I simply slice them raw into our green salads. They are a sweet crunchy addition, a bit like a carrot, and work well during the winter months.
Last night, I roasted the sunchokes pictured above with garlic (from the garden), 1/2 of a chopped yellow onion, salt, pepper, and thyme. My husband was a bit surprised at the first bite – he thought he was eating a potato! But once he adjusted his expectations, he put a dent in his portion!
Roasted Jerusalem Artichokes
Directions:
Scrub the Jerusalem Artichokes/ Sunchokes and remove any dark spots. Cut into uniform pieces. In a roasting pan combine Jerusalem Artichokes, fresh chopped garlic cloves or powder, 1/2 of a chopped onion, and seasonings of your choice – I used salt, pepper, and thyme. You can also toss them in olive oil if you prefer. We avoid oil in our house. Roast at 400 for 45 minutes, stirring halfway through. You can also use an air fryer to make them extra crispy although I’ve found I get the best results if I boil them first. Enjoy!
Wow, where did the time go? So sorry I’ve been neglecting this blog. I started it so that I would have an online journal of when I planted things, which recipes work best when I have an overabundance of an herb or vegetable, and a place to record some of the crazy meanderings of my mind while weeding a garden bed!
Nope, didn’t happen quite as planned this year. But then, when do things ever happen according to plan? I won’t bore you with details but once again health issues and family obligations got in the way of my blogging ambitions. But not to worry, just because I wasn’t writing about gardening, doesn’t mean I wasn’t gardening! And frankly, most days I either had the energy to write about gardening or take care of my garden. So mostly, I took care of the garden although this years Fall garden was pretty much a failure. I did get in 200 garlic and 100 onions. As soon as I finish searching them out from under all of the weeds, I’ll let you know how they are doing! And the 36 kale plants I started and never got around to putting in the ground became slug food. One day they were there happily growing in their tray and a few days later, slimeageddon! LOL
Last year I also started gardening a new section where I had previously been slow composting for the past 10 years. It was growing great – pole beans, kale, chives, a couple of volunteer cherry tomato plants, and a few wandering herbs. Then our air conditioner died and that little bit of yard I had reclaimed was laid waste by the air conditioning crew traipsing back and forth to remove the old unit and put in a new one. Sigh . . .
The good news is that the area is cleared up and I’ve started replanting. I’m looking forward to harvesting significantly more green beans than I did last year! And remember the cucumber overload? The garlic dill slices I made last year have been a huge hit! I will definitely be planting too many cucumbers again this year as well as increasing my Egyptian Walking Onion Beds. The dried onion powder is the absolute bomb in my spice cabinet! But there were also a few failures. I’ve made garlic powder in the past and thought it was too much work and not worth the effort or electricity. This year I read about roasted garlic powder and thought that might take less time in the dehydrator and be tastier than store bought garlic powder. Nope. Definitely cheaper to buy garlic powder in bulk than to make it myself. The roasting before dehydrating didn’t magically transform the process. So, I continue to live and learn. Projects planned for the next few months of 2019 include:
Finish pruning the fruit trees.
Downsizing and replacing my Jerusalem Artichoke beds.
Removing the raspberries and replacing them with more sweet potatoes.
Finish my ornamental sitting area in the back corner of the yard. (It’s too shady to grow anything edible in!)
Find a dedicated area on the back patio for my tropical fruits!
Trying to limit my plantings to things/quantities that we can use!
It’s good to be back chatting, planning and hopefully, tracking my progress! Here’s to a very productive New Year!
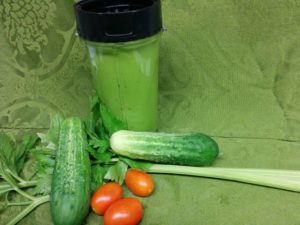
We’ve been harvesting and eating so many cucumbers, I haven’t bothered posting about it. Today I picked enough to make some spicy garlic dill slices for sandwiches. I used the recipe found here .
The only change I made was to add 1/8 teaspoon of pickle crisp to each of the 4 pints. I don’t like adding chemicals to our food but I also know that my family won’t eat pickles unless they are crisp!
They are off to a cool, dark place to finish bathing in seasoning. I’ll let you know how they turn out in a few weeks.
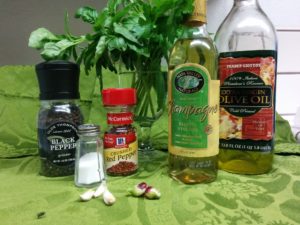
For those who know me, a recipe is merely a starting point. This dressing is no exception. Every year at this time, I’m drowning in fresh basil. So, every year at this time, I make enough pesto to feed an army and freeze it. The problem? We don’t eat all that much pesto so it was time to find another use for all of our basil.
This dressing is the answer! I did a search for “Basil Vinaigrette” recipes and came up with several recipes that sounded delicious. Then, I did what I always do, I improvised! This “recipe” is perfect for using whatever you happen to have growing in your yard on the day you need it. Most recipes call for 1/4 cup or more of olive oil. We try to limit our oil intake, so this only calls for 1 tablespoon of oil. But if you want more, slop in more! Consider this merely a guideline to your own salad dressing adventures!
Ingredients: Fresh Basil – 1 to 2 cups Fresh Parsley – 10 leaves or to taste Vinegar (your choice) – 2 to 5 tablespoons Olive Oil (or not) – none to 1/2 cup Pepper – to taste Red Pepper Flakes – to taste Salt – to taste Fresh Garlic – at least one clove (live dangerously – add more!) Onion – Whatever you have! I’m using Egyptian Walking Onion Bulblets
Directions: Throw all ingredients into a blender. I use the smoothie cup from my Ninja. Blend, taste, add more seasonings if needed, blend again, dump on your salad. I’m guessing that because of the vinegar, this will last at least three days in your refrigerator. I usually just make enough for one meal at a time but then, we eat really BIG salads!
I plan on experimenting with a basil tarragon dressing to use on chicken salad. Stay tuned to find out how that variation goes!
Tonight’s dressing along with some other vegetables picked from the garden for our nightly salad.
We recently moved our daughter and most of her furniture back home when she graduated from college. One of the things we didn’t move was her bed frame and mattress. They were old to begin with and after 4 years of living in an apartment complex built in the 1940’s that came with bedbugs, we decided we would not be moving it back to the house!
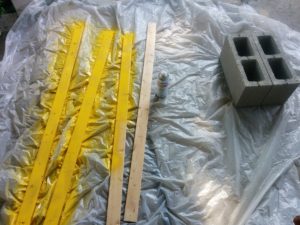
So, Hubby set to work dismantling them both into smaller sections so they would fit into the apartment dumpster. Don’t feel too badly for him, I suspect he has a secret fascination with seeing if there is something he can’t deconstruct with his Sawzall! In the middle of the bed frame deconstruction, I noticed a few items that I could easily repurpose: 4 wooden slats and a metal panel.
Where is that bed frame now?
Wire panel from bed frame being repurposed as a trellis for pole beans. I had just been researching investing in cattle panels, but couldn’t justify spending more money than the product I was growing would have been worth. So glad I waited!
The four bed slats, two cinder blocks, and a can of spray paint.
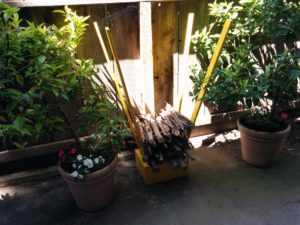
The four bed slats repurposed into wood storage for our fire pit! Super easy project and it’s nice to have the wood neatly stored in plain sight.
It’s not hoarding if you use the things you’ve rescued! Never you mind about the rolls of rescued chicken wire I have stashed in the garden shed!