Glorious Garlic!

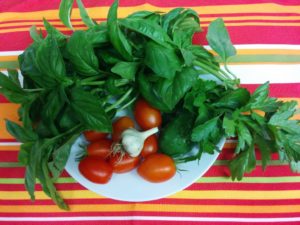
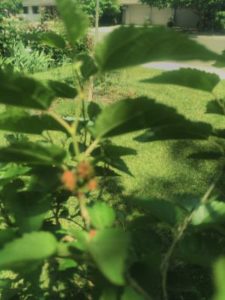
Garlic is my favorite herb, both medicinally and for flavor.  There is nothing better than a warm baked clove of garlic spread on a piece of straight out of the oven homemade wedge of sourdough bread.  And for someone with a history of chronic infection, high quality garlic oil capsules are a staple in my medicine cabinet.

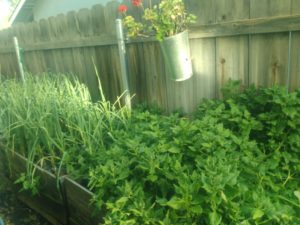
But garlic is also one of those things that someone as disorganized as I am can grow with ease.  It doesn’t need constant care.  You plant it, toss some water on it during dry spells, and leave it alone to do it’s thing.  It even acts as its own pest deterrent!  In other words, it’s the perfect plant:  it grows itself and everyone in my family will eat it!

One of two garlic beds – this one is next to a bed of New Zealand Spinach. Both of these plants pretty much grow themselves and are pest resistant. Picture was taken in February 2018

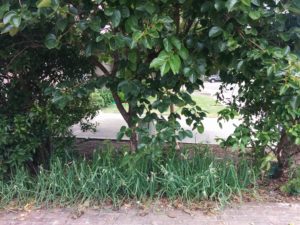
Today was THE DAY – the day the garlic was ready for harvest.  Actually, the garlic was ready a few days ago but life happens, so I guess I should say today was the day I was ready to harvest the garlic!  This is my 7th year growing garlic successfully.  My organic seed garlic came from Bountiful Gardens, a John Jeavons organization that no longer has a retail shop.  I believe their source was Big John’s Garden in Oregon.  But as you know, being the disorganized gardener that I am, I can’t be 100% sure.  All I know, is that my first few years were a bit rough, but by carefully selecting and reseeding the largest heads, I now have garlic that has acclimated very well to Central California’s climate.  I believe that this is my third year of being able to grow and store enough fresh garlic for seed and for use for an entire year.  I did cut it pretty close, I think I have only 6 heads left from last years harvest!

Garlic that is past ready to be harvested.  The bulbs were planted mid-September 2017.

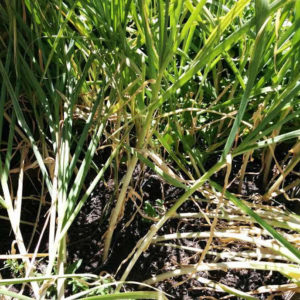
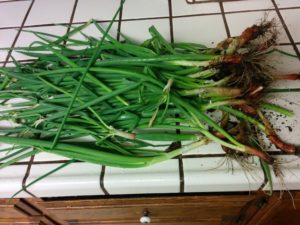
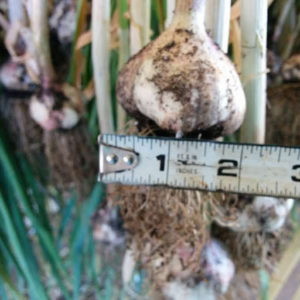
This year was an awesome harvest – most of my bulbs were around 2 inches across with some larger, some smaller.  The size of the bulbs actually slowed down my harvest.  Because of my cats, I plant into chicken wire so they are unable to dig up my garden beds.  This year, the bulbs were so large I had trouble fitting them through the openings!

Most bulbs were about 2 inches across this year.

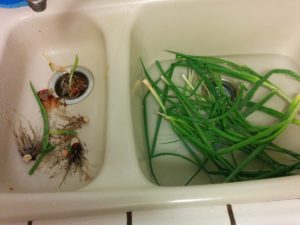
Since I grow in the soft soil of raised beds, I use my fingers to gently reach into the soil under each bulb and push up  while  pulling on the leaves.  It’s important to not damage the leaves or the roots until the bulb has pulled all of the nutrients and energy from them during the curing process.

Curing process?!?  That sounds complicated!  Hopefully you know me well enough by now to know that I don’t do complicated.  All it means is that we let the garlic, leaves, and roots dry.  Many people braid the garlic, but since I’m only growing for my own use, I don’t bother with tarting my garlic up with braids.  Besides, garlic is best stored in a cool, dark area.  Putting it on display shortens it’s lifespan.  Did I also mention it’s easier and faster to do it my way?

An old clothes drying rack makes a perfect place to cure your garlic.

I used to cure my garlic indoors but my family, while lovers of garlic, weren’t overly fond of the mess or the smell.  Now, my garlic hangs out in a shady spot on our back patio.  While garlic can take up to 2 months to completely dry, here in our triple digit, low-humidity summers, the drying process usually takes just a few weeks.   As you can see, I’m using an old clothes drying rack to hang the garlic from.  After it’s completely dry, I’ll trim the roots and leaves and take a few layers of the papery skin off to remove the dirt.  Then, I’ll store the garlic in the black rack you see at the top of the picture.  This is nothing more than a tray from the nursery that six-packs of impatiens came in.  I’ll place the rack on top of some wooden blocks on a shelf in my pantry so that air can circulate freely around the bulbs.  That’s it, done.  And all I had to do was water a few times!


When Life Gives You Not Quite Enough Cucumbers . . .

Go and look again!  For every cucumber I pick at the perfect size, there seem to be three more that I completely miss until they are the size of a kayak!  We’ve had a streak of hot weather and my cucumbers have been thriving in the heat.  I currently have 4 producing cucumber plants.  Because I mostly grow in containers, I grow a combination of pickling cucumbers and lemon cucumbers.  They are smaller and will climb a trellis quite happily.  But, because I am cramped for space, I have vines weaving in and out of everything and it’s easy to miss a rogue cucumber.

June 2, 2018
Cucumber Harvest!

One of my goals this year was to grow enough cucumbers for relish and pickles.  So, I was thrilled to come in from the garden with a bowlful of cukes.  Because they were several different sizes, I decided to make relish.  Alas, I was 5 ounces short!  What to do?  The answer was easy enough, head back out to the garden and be a bit more thorough with my cucumber hunt.  Lo and behold, hanging down the back of the planter against the house, was another cucumber!  I was absolutely shocked, not!  LOL

The relish was saved!  Although in a pinch, you can substitute a zucchini or two if you are short on cucumbers.  But, where would I ever find a zucchini?!?

What do you do when life gives you cucumbers?

Relish them!

You Snooze, You Lose!

Noooooo!

Do you recall me bragging about being able to eat my first tomato of the year? Well, someone beat me to it.  Or, I suppose I should say “something.”  I suspect a member of the slimy hoard family (slug or snail).  I was having some stomach issues so put off picking the wonderful tomato until I could handle the acid.  I waited too long!  But, all is well.  I reapplied the Sluggo and have since consumed the tomatoes that ripened shortly after my “first that wasn’t my first.”

Ripe tomatoes = all is right in the world.

Today’s Eats!

May 27, 2018 Zucchini, cucumbers, celery leaves, basil, New Zealand Spinach leaves, and our daily radish. Not pictured but consumed were raspberries, mulberries, Egyptian Walking Onions, and mint leaves for a refreshing iced mint tea.
June 1, 2018 The last few days I’ve had a stomach issue due to a medication.  While my family ate cucumbers and basil, the only thing I consumed from my yard was the last of my dried peppermint leaves from last year.  Peppermint tea is amazing for settling an upset stomach.  So, currently the dehydrator is full of mint leaves for future use.  Hopefully, not for future medicinal use!
June 2, 2018
Cucumber Harvest!
June 3, 2018 – tonight I’ll be making a basil vinaigrette using basil, parsley, garlic, and onion from the yard. It will be served over a salad of spinach, tomatoes, cucumbers, onions, and mozzarella cheese. This will accompany a Greek Bean Soup I made using from the yard: celery, oregano, and bay leaf.
June 4, 2018
Last night’s basil dressing was so delicious that I made it again! In addition to the basil, parsley, onions, and garlic I picked for the dressing, I also harvested more cucumbers, a few tomatoes, and some celery. The stalks will be chopped up into tonight’s salad, the leaves will be saved for soup stock.

June 5, 2018

Picked 3 more cucumbers today and a few tomatoes.  We’re getting a bit tired of cukes so the only thing we’re consuming that came from our yard are some green onions in a potato salad and some of the dill relish I made a few days ago in our tuna salad sandwiches.  I have another row of cucumbers just now reaching toward their trellis.  I may have overplanted!  LOL

Also, it’s officially hot here in Central California so iced mint tea with mint from the yard is being consumed in large quantities.  I’d prefer to make Mojitos with all of the mint but the sometimes the demands of the real world don’t mix with Mojitos!

Egyptian Walking Onions

A bed of unruly Egyptian Walking Onions – left to fend for themselves for a season (or two!)

Several years ago, I bartered some seeds with a gardener in Washington State for some Egyptian Walking Onion bulblets.  I have them growing here and there in odd corners of the yard, but their main bed is in a narrow area that borders the driveway in the front yard.  As you can tell, they share the bed with three fruit trees from left to right – an orange, a persimmon, and a tangerine.  I planted them and have pretty much ignored them and yet, they prosper!  Definitely my kind of plant.  And although they are recommended for full sun, they seem quite happy in the filtered sun they get through the canopy of the fruit trees.  I’m guessing they are especially happy for that filtered light when we get several triple digit days in a row during our Summer months!

Here in Central California, Egyptian Walking Onions are a perennial.  I mainly treat them as  green onion, although I’ve heard you can pickle the tiny little red bulblets.  But honestly, who has time to laboriously peel the cute little things?!? This year, I absolutely had to pay them some attention.  The bed is far too densely planted but not because of any help on my part! They freely multiply themselves – consider them the allium version of a tribble.

So, what to do with the things?  I gathered an armful and headed to the kitchen.

An armful of unwashed Egyptian Walking onions.

First they needed to be cleaned and sorted:

A two-sided sink is useful for this task. Make sure the trimmings are on the side with the garbage disposal so you can quickly dispose of unwanted creepy crawlies! (Not to worry. No ladybugs were harmed during the cleaning of these onions!)
Cleaned and sorted!

To the left are the smaller, most tender shoots which I finely chopped and stored for use on our daily green salads for the week.  In the middle are the tougher, older shoots.  While these can be used as fresh green onions, they are stronger tasting and tougher to chew, so I tend to chop these and freeze them for use in casseroles, scrambled eggs, and stews.  I like to have at least a gallon or two in the freezer for this purpose.  To the far right are the “bulbs” and the tougher green stems. They are slender like a shallot but I feel they really need to be cooked to be edible.  While you can freeze them to help break down the fibers, I like to quickly blanch them, throw them in the dehydrator, and then grind them up to use as powdered onions.

The tougher sections off to the steamer to be blanched before hitting the dehydrator.
Out of the steamer and into the dehydrator!

The armful I cleaned today allows for about two trays of the white ends, and then the remaining trays were filled with unblanched sections of greens from the middle section.  What doesn’t fit in the dehydrator heads off to the freezer:

Flavor for the coming Winter’s soups!
Dehydrated onions pulverized in a coffee grinder used exclusively for spices.

The  dehydrated onions from 2 weeks ago finally made it to the coffee grinder I reserve exclusively for spices.  Six cups of dehydrated onions make about one cup of powdered onions.  I love using this powder in my homemade ranch dressing and my spinach dip, but it does lose it’s potency after about six months so grind it in small amounts and store it in a dark cupboard.  My suggestion is to grind up what you can use in that time and store the remaining dehydrated onions without grinding them.  They will last about two years if stored in a cool, dark cupboard.

Now, time to rinse and repeat the above process about 5 more times!

Closing tips:

By the way, the green lid on top of the jar  is from a parmesan cheese container.  The screw on lid will fit the top of a small mouth canning jar and has two tabs: one for shaking product out and one for pouring large amounts.  These lids are perfect for spices!

Also, please note the classy painter’s tape label on my jar.  I sterilize and reuse my jars over and over.  I even have jars that belonged to my Grandmother!  But one thing that drives me absolutely bonkers are adhesive labels that won’t wash off.  Painter’s tape peels right off with no scrubbing. Perfect for someone who doesn’t want to spend hours with a scrub brush and a bottle of Goo Gone!  

It’s almost time!

For the first tomato!  Yes, it’s only a grape tomato, but it’s still very exciting!  But, don’t tell anyone else in my family about it’s existence because I’m probably not going to share!

Oregano – The Tasty Trespasser!

IMG_20180419_112243

Do you see this patch of oregano?  It shouldn’t exist.  I pulled it all out two years ago to make room for lavender and some seasonal veggies.  It was gone, gone, I tell you!  I saved a small section of the plant and potted it in a nice sunny spot in the backyard, underneath the fig.  Don’t even get me started on the escapades of that plant!  It has escaped the confines of it’s large pot and is taking over the lawn in the backyard.   At least it smells nice when we mow.


So, what do you do when life gives you oregano?  I figure you have three choices:  1) You can spend the rest of your life cursing and chasing down the insidious rhyzomes 2) You can give up and monocrop your entire garden, lawn, flowerbeds, sidewalk, adjoining neighbor’s yards, potholes in the street, until eventually the entire country is covered in oregano 3) You can eat really well!


I’ve decided to take the latter option.  Besides being tasty, oregano is so full of healthful benefits that it should be enjoyed daily if possible.  It’s an anti-inflammatory, contains natural antioxidants, and has even been used in fighting MRSA.     

Besides, it tastes really awesome on a pizza!

It’s that time of year . . .

Where keeping up with garden beds already planted and preparing new beds before it gets too late, is almost overwhelming!  But fear not, I haven’t abandoned all hope quite yet.   I’ve been prepping what was my old compost bed for an experiment in beans and kale (post and pics coming soon), prettifying a formerly desolate corner of the yard, and keeping things wet and happy!  Here are a few pictures from tonight’s garden wanderings:

The New Zealand Spinach bed is taking over the world! I’ve got to carve out some time to deal with this beast and soon, or I won’t be able to get at my garlic and cucumbers!
The Jerusalem Artichokes are almost as tall as I am!
It’s not only the bees who are happy in my tiny, mismanaged garden!

Okay, off to put another load of oregano into the dehydrator!  Happy Gardening!

Tasty Watering!

I have a love/hate relationship with watering.  I love the productive results of watering but sometimes, it takes more time than I have minutes in my day.  Yes, I sort of have a makeshift automatic watering system for use when I have to be out of town, but because my beds shift around so much and I have multiple plantings in each bed that have different water requirements, it’s best to hand water.  It’s also a much more efficient use of our water resources to water when the plants actually need to be watered.  I’m not aware of a timer (at least not in my budget) that will water based on weather and individual plant needs.

But, there is a definite upside to gardening:  NIBBLING!  It won’t be long before my  watering sessions also become mealtime!  Look what’s coming my way:

Apricots
Figs
Raspberries
Mulberry!

And this is just the sweet stuff.  It won’t be long before I start keeping a salt shaker in the garden as well!  The thought of juicy, warm tomatoes straight off the vine is making me hungry . . . but that’s for another post!

Happy Gardening!